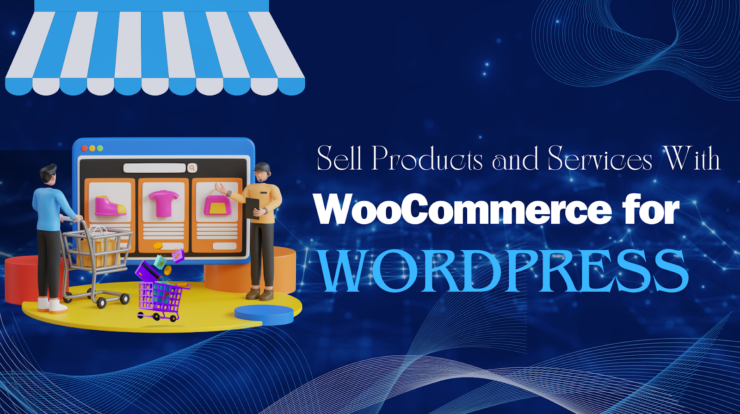
Having a service or product based business in the present time, you must need an online presence to make your business profitable and for that you will find several solutions to sell your products and services online. But when it comes to the easiest way, there is no one other than WooCommerce, which will save your time, help to grow your business and will also contribute to your customer experience. WooCommerce is the most popular eCommerce plugin for WordPress websites. It has already made a lot of businesses successful from small to large businesses.
WooCommerce provides a very easy to follow way to set up your e-commerce store. In WooCommerce you can build a complete featured online store. There are many dedicated plugins which will help you to customise your online store. It also offers several features for payment processing, product management, shipping options, and many more.
In order to grow your online business, customer experience and satisfaction is always the top priority. Today your business doesn’t just need a very professional and visually appealing website but it also must be optimised for security, speed and performance. We can’t also forget mobile-friendly designs, fast load times, easy checkout processes, and secure payment options and WooCommerce has the ability to deliver all this.
Why Millions Trust WooCommerce?
To set up your store in WordPress, there are various plugins like WPecommerce, Cart 66, Jigoshop, MarketPress, WP shop, and many more. But still over 4.4 million websites of the world have chosen WooCommerce because of its highly admirable qualities like it is a very flexible, quick and efficient e-commerce plugin. For WordPress, It is the most powerful and complete e-commerce plugin.
If you don’t know, then you will be happy to know that WooCommerce is an open source and free plugin, hence it is easy for users to create and manage their online stores without losing a single penny. It is also customisable, which gives a way for businesses to meet their specific needs and which ensures flexibility and innovation.
WooCommerce has such a huge download base, because it has a large number of features, which solves different numbers of problems. Businesses can manage their product listings and inventory in order to handle shipping, payments, and taxes.
Millions of businesses prefer WooCommerce as it provides all of the major plugins which your business needs to get started, the plugins are:
- Stripe Gateway
- Shipping & Tax
- Google Analytics Integration
- Kadence Email Designer
- Checkout Field Editor
- Cart Abandonment Recovery
- PayPal Checkout Gateway
- Coupon Shortcodes
WooCommerce can be integrated with popular marketing tools, that includes Mailchimp and Google Analytics. It is designed with SEO properties, which allow its users to optimise their product pages for search engines.
WooCommerce also releases their updated version, whenever a vulnerability is detected and you can also integrate security plugins with it to make both your site and store secure.
How to Install and Setup Your WooCommerce Store
To set up your e-commerce store and add your products or services in WooCommerce, we first have to install WooCommerce plugin in your WordPress site, which will become easier for you by following our tutorial. So, let’s start with the installation of WooCommerce.
Step 1: Installing WooCommerce

In the beginning you have to log into your “WordPress Dashboard” through username and password by adding /wp-admin as suffix to your site’s domain name like this: yourwebsite.com/wp-admin
Then simply take your cursor to Plugins located on the sidebar at left and in the dropdown menu click on Add New Plugin.
On the right, click on the search bar and type “WooCommerce”, you will see WooCommerce as the first result because it is automatic.
Now click on the Install Now button which is next to the WooCommerce plugin, after completing installation click Activate.

Step 2: Welcome to Woo!

After activation, Setup Wizard of WooCommerce will be launched automatically and this wizard will help you in configuring the basic settings of your online store and to provide some details.
In order to proceed, click on the “Set up my store” button.
Step 3: Your E-Commerce Journey

Select your current commerce journey whether you are just starting your business or you are already selling something, and you can either choose the third option, that you are setting up this store for a client.
- I’m just starting my business
- I’m already selling
- I’m setting up a store for a client
Click on the “Continue” button to proceed.
Step 4: Store Setup Details

Here you have to give some information related to your store, which will be used to help you set up payments, shipping, taxes and more in the best possible way. The info includes:
- Store Name
- Product or Service Type
- Store Location
- Email Address
If you want to receive discounts, tips and recommendations from the Woo team, that will be received directly into your inbox, then don’t forget to check the checkbox. And click on “Continue” button.
Step 5: Get Free Features
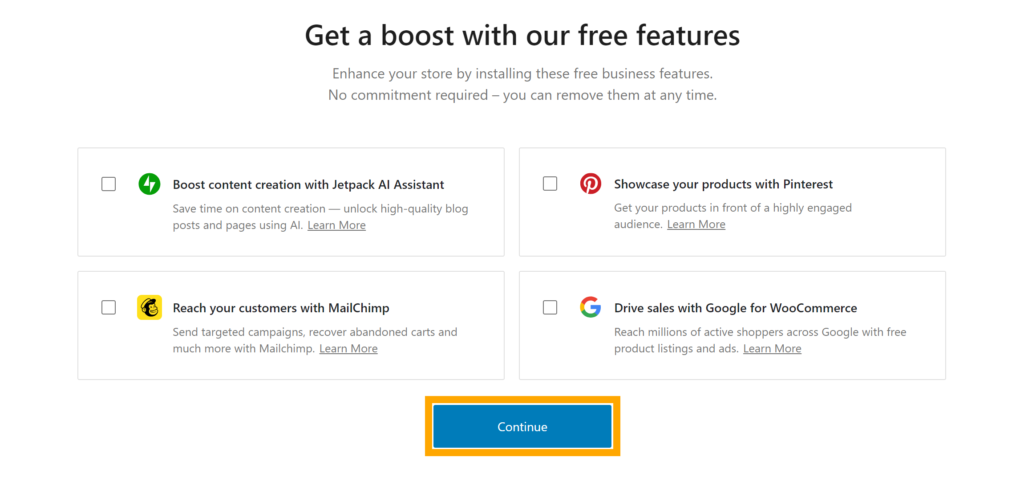
On this interface, you will have the power to get some free features of WooCommerce, If you want them simply check their checkboxes. If not then don’t select them. Here is a small description about the benefits of these features:
Jetpack AI Assistant: This Ai can be used to create posts and pages, hence will save your time.
Pinterest: Pinterest has a huge audience, where you can show your products to that audience
MailChimp: This is an email-marketing tool that collects subscriber data and also sends emails to market your products and sales in order to get new sales.
Google: It can be used to run ads related to your products and services which will eventually increase your sales number.
Now, click on the “Continue” button.
Step 6: Completion of Basic settings and Details
You have reached the last step of the wizard, that is you have to wait for some time and then you will be directed to your Dashboard again.
Configuring Your WooCommerce Store Settings
Click on Settings in the dropdown menu of WooCommerce, you will be taken to an in interface where you will see default list of settings, which includes both the configured one during the setup wizard process and the ones that WooCommerce has already set for you.

1: WooCommerce → Settings → General
The first section is labelled as “General” which includes your store address that you already set in the Setup Wizard. And below you will also see a section for choosing countries, in which you want to sell your products or services and also the option to choose your currency type.

In this same section you can enable the use of coupons and can choose whether you want tax calculations done automatically or not and remember it is recommended.
Now save the changes and move to the next section”Products”.
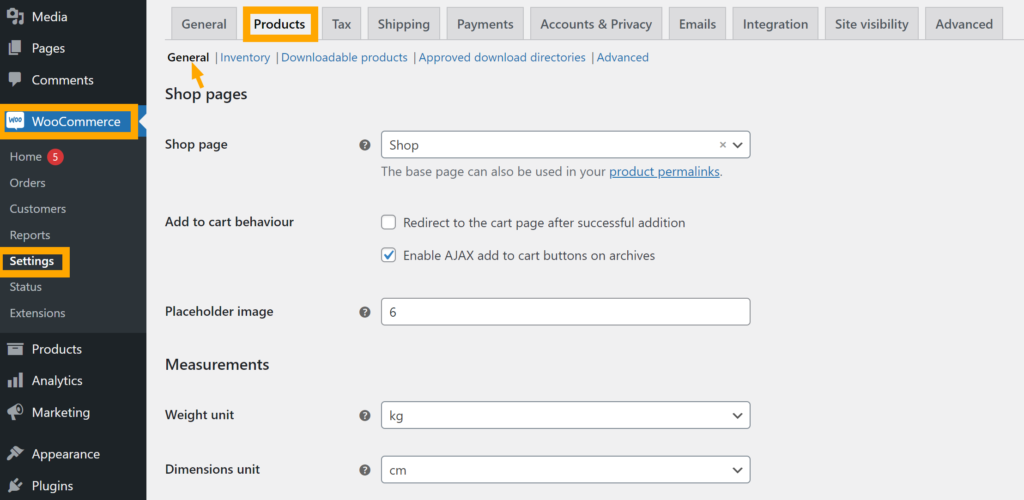
2: WooCommerce → Settings → Products
This second section is “Products” which is subdivided into four parts: General, Inventory, Downloadable products and Advanced
In the General part of this section, you will have the following:
- The base page where your store’s products are displayed
- The Actions that will occur taken when a product is added to the cart
- Product Ratings configuration options
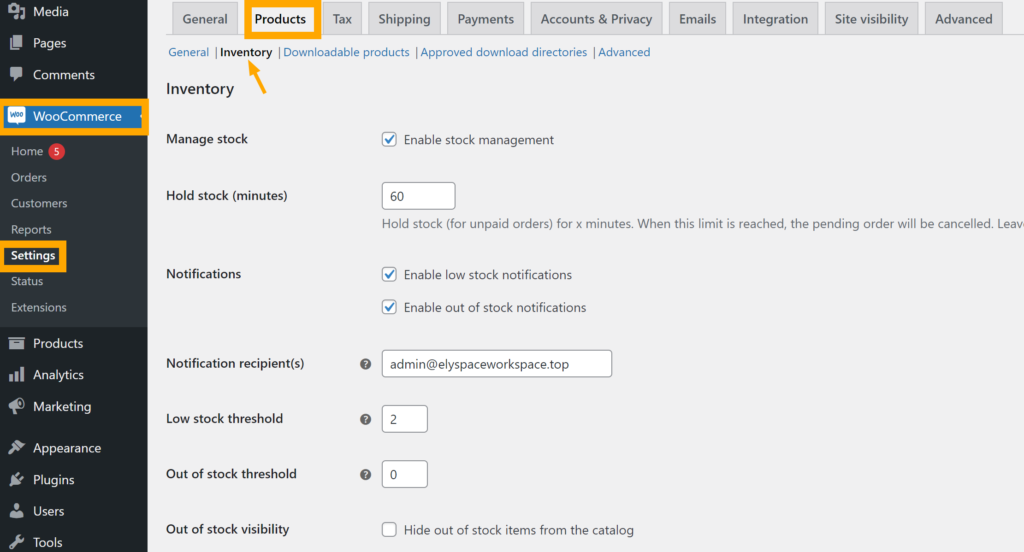
Now click on Inventory, where you can activate stock management and set up low stock alerts.
After that we have Downloadable products, where you can manage options related to downloads.
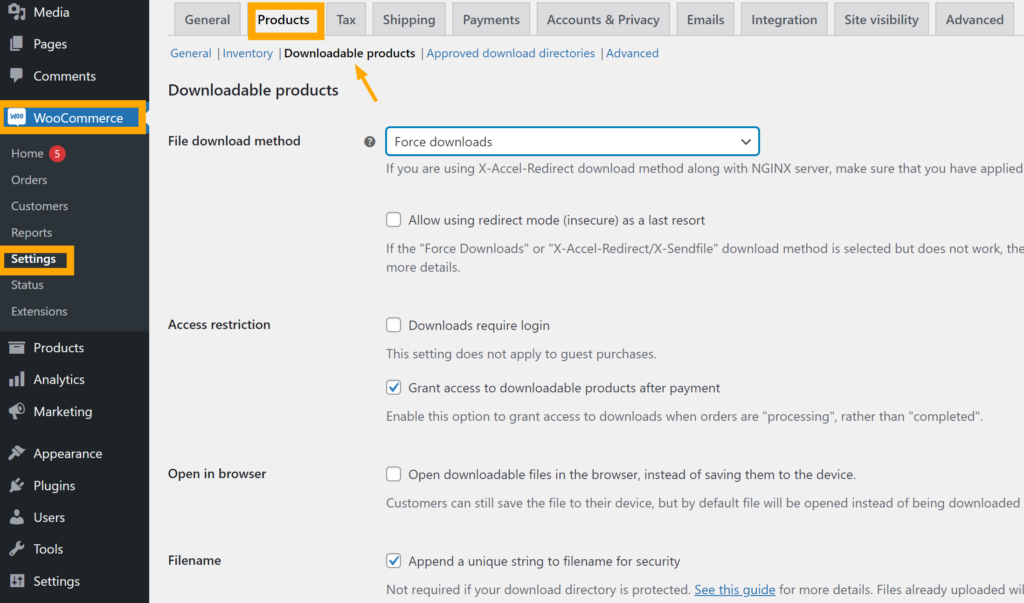
“Approved Download Directory” gives you the option to set the location for downloadable product files, where they will be stored. The use of this directory is to manage and deliver digital products.

Finally, you have “Advanced”, where you can configure additional product-related settings. Here you will find Purchase Note, Menu Order and Enable Reviews.
3: WooCommerce → Settings → Tax
In “Tax” tab you have the choice whether you wang to manage taxes or you want WooCommerce to do it for you automatically.
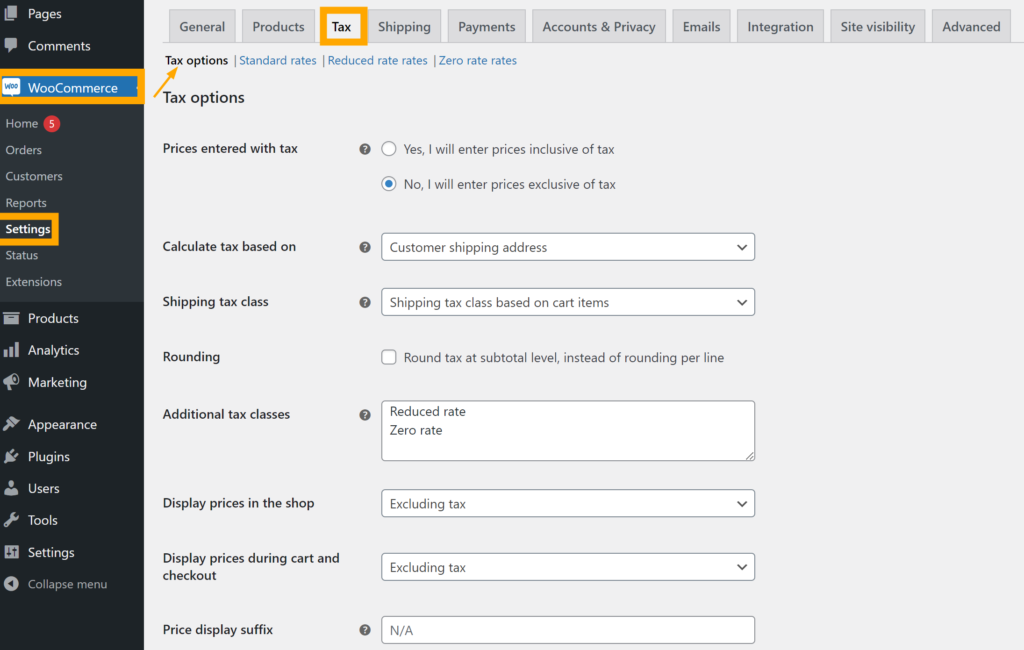
Manually you can customise different settings that are related to product taxes, which includes how taxes will be calculated, types of tax, and the option to choose whether you want to show prices with or without taxes on the frontend of the store.
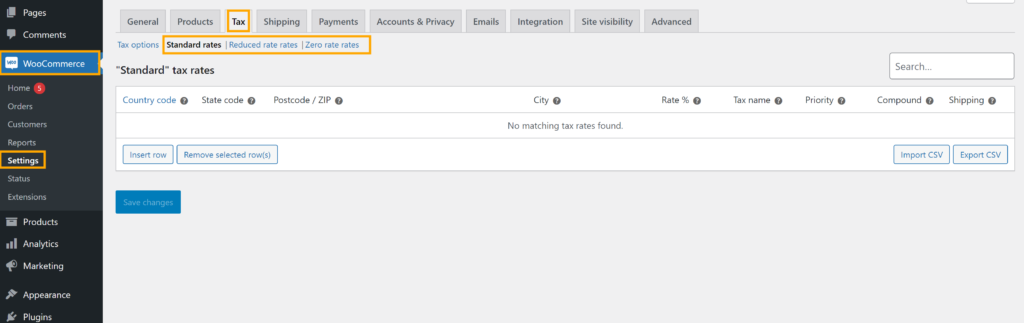
Under “Tax” tab we have other three sections:
Standard Rates: Here you can set up regular tax rates which are applied to most of the products. On the basis of country, state and postal code you can set different tax rates.
Reduced Rates: When a product or service qualifies for a lower tax rate as compared to the standard rate, then Reduced Rates are used for that.
Zero Rates: This section is for those types of products which are tax free such as some medical goods or educational materials.
4: WooCommerce → Settings → Shipping
In the “Shipping” tab, you have all settings that are related to Shipping of your store.
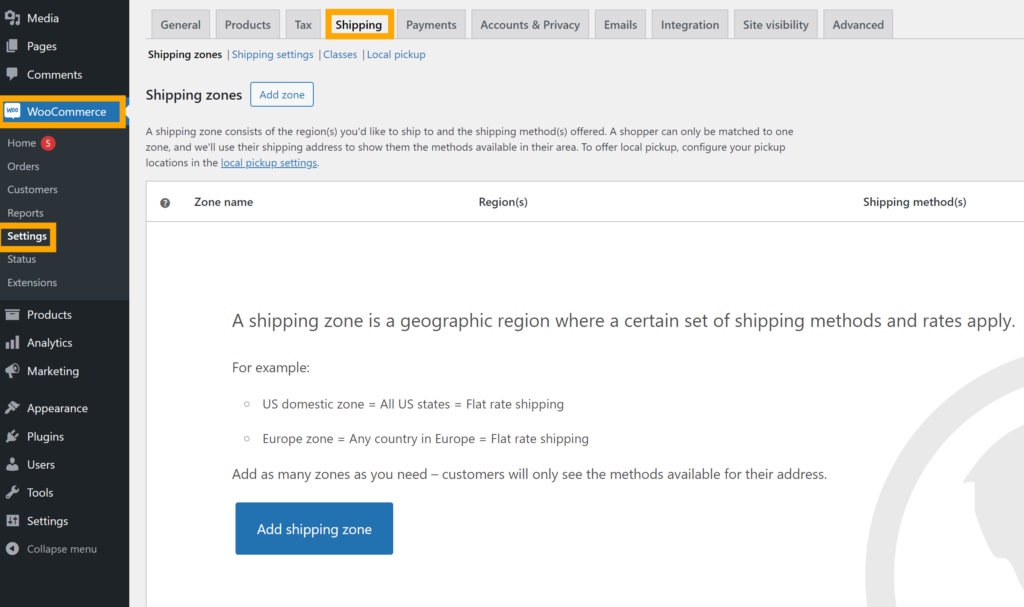
This section contains the following settings:
Shipping Zones: Define geographic areas for shipping methods and rates. Here you can define geographic areas for shipping rates and methods.
Shipping Methods: Here you can set options like Free Shipping, Flat Rate, and Local Pickup for each and every zone.
Shipping Options: Here are global settings, where you can enable default shipping destinations, shipping calculators and many more.
Shipping Classes: On the basis of characteristics you can group products in order to apply specific shipping rates.
Debug Mode: By disabling caching temporarily you can troubleshoot shipping issues.
5: WooCommerce → Settings → Payments

You can do all this in “Payments” tab:
- Enable/Disable Payment Methods: Whatever payment method you want your customers to pay through can be turned on or off.
- Payment Method Settings: Each payment method has its own specific settings, like merchant IDs and API keys.
- Payment Method Order: In order to prioritise certain options during the checkout process you can rearrange the order of payment methods.
- Custom Payment Gateway Options: Any payment gateway which you want to use, you can set up and enter details for that.
- Enable/Disable Payment Action: Payment processing can be controlled through different actions (like “Authorise” or “Capture”).
- Additional Options: For specific payment methods you can set up features like refund capabilities, recurring payments, or checkout customisation.
- Payment Notifications: You can also Set up notifications for your customers related pending, successful, or failed payments.
6: WooCommerce → Settings → Accounts & Privacy
In the “Accounts & Privacy” section, there are significant settings which will help your online store to obey regulations.
Customers should be allowed to make purchases as guests, which means there is no need to create an account or share personal information. By doing that you can increase the conversion rate of your store because the purchasing process becomes very easy. and there are many more options to explore.

7: WooCommerce → Settings → Emails
In the “Emails” section, all email notifications can be configure which are sent from your store to customers and administrators that are related to different events and order statuses.
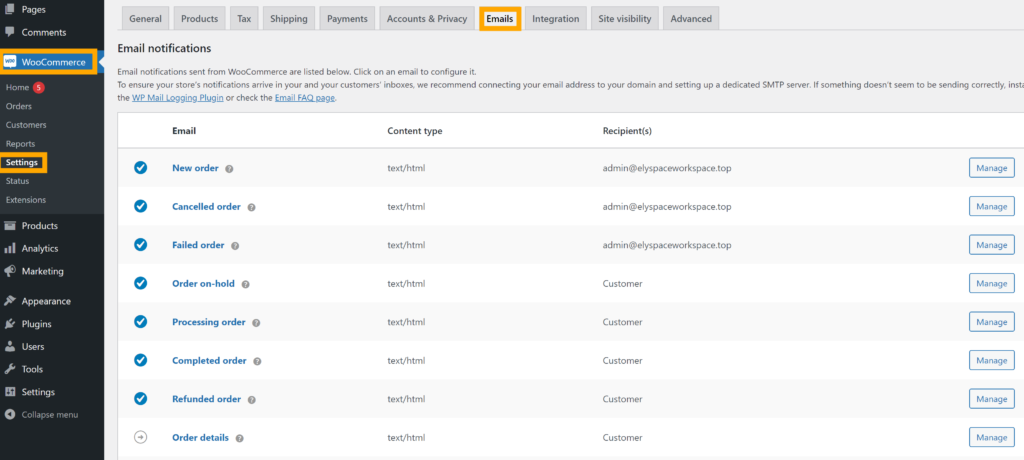
Here is what you can do in this section:
WooCommerce can send you different types of emails, like:
- New Order
- Cancelled Order
- Failed Order
- Order On-Hold
- Completed Order
- Refunded Order
- Customer Invoice
- Customer Note
- Reset Password
- New Account
For every email you can enable or disable notifications. You can customise a whole email.And can easily decide what you want to show in the email.
8: WooCommerce → Settings → Integration
If you want to enhance the functionality of your store, you can easily connect and set up different third party tools and services in the “Integration” section. Here you can also manage settings of these services or tools, like authentication, API keys and specific features.

9: WooCommerce → Settings → Site Visibility
Appearance of your site is managed in he “Site Visibility” section.

Coming Soon: A “Coming soon ” landing page will be shown to visitors.
Live: Anyone can see the content of your site, it’s entirely visible.
10: WooCommerce → Settings → Advanced

In the “Advanced” section, various settings can be configured which affects the overall functionality of your online store. This includes:
- Page Setup: Pages can be assigned to cart, checkout, and account management.
- REST API: API settings can be managed to integrate with the other applications.
- Webhooks: For events, notifications can be set up in your store.
- Endpoints: URL endpoints can be customised for the checkout process.
WooCommerce → Status
This section lies in the dropdown menu of WooCommerce. In the “System Status” section you are allowed to access the technical information of your WooCommerce store and you can also verify its configuration status.

Here you can check the health of your WooCommerce store, there are tools for troubleshooting issues and also it has error logs which helps in diagnosing problems.
WooCommerce → Extensions
In “Extensions“, you can manage and set up some additional features or plugins, which will help to extend functionality of WooCommerce. In this section you can integrate third party tools, such as shipping methods, payment gateways, or marketing extensions for your store.
There are many extensions, both paid and free, but paid ones still cost less than a developers fee.

Now, you can easily create your product pages after finishing setting up and installation of extensions.
Adding and Managing Products in WooCommerce
In the journey of launching your business, the first step is to add your products. Your WooCommerce will not become functional until you add products first. It is very significant to learn about the basics of WooCommerce before diving into details, such as attributes, product categories, and types.
Product Category
To categorise products into different groups according to the nature of the product, product categories are used. Let’s take an example, if you have a restaurant website, and then your some categories will be ‘Burgers’, ‘Pizzas’, etc. By creating these categories and placing products in those categories, it makes it easy for customers to find their desired products. You have the power to create as many categories as you wish and can also edit them whenever you want.

Product Labels
Product Labels are the small tags or text which appear on your products in order to highlight their specific information. If you want to make customers quickly understand the key details about any of your products, you can take help of labels. Here are some common labels:
- “On Sale”
- “New”
- “Out of Stock”
- “Featured”
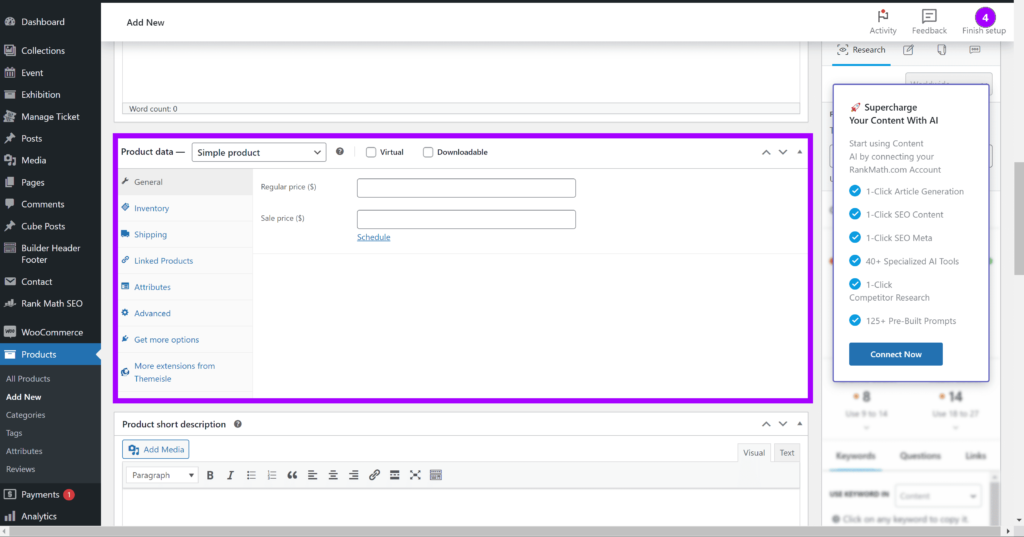
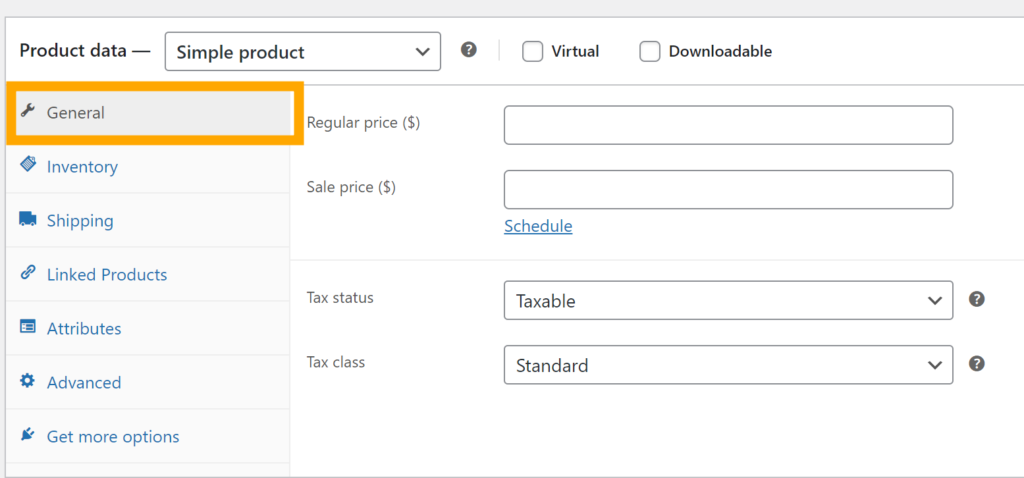
Product Data
In the Product Data section you can choose the type for your product that you want to sell. Your time is saved because WooCommerce provides predefined product types.
- Simple Product:
- A product which has no options, like a physical book. It doesn’t have any variations.
- Grouped Product:
- It is a group of similar items that are sold together. In simple terms it is a group of related products that can be bought individually.
- External/Affiliate Product:
- the product which is displayed on your website, but when a customer purchases the product, it occurs on some other website.
- Variable Product:
- A product which has different variations, like size, style or colour.
- Virtual Product:
- That Product which doesn’t require any shipping.
- Downloadable Product:
- That product is downloadable after a customer makes a purchase.
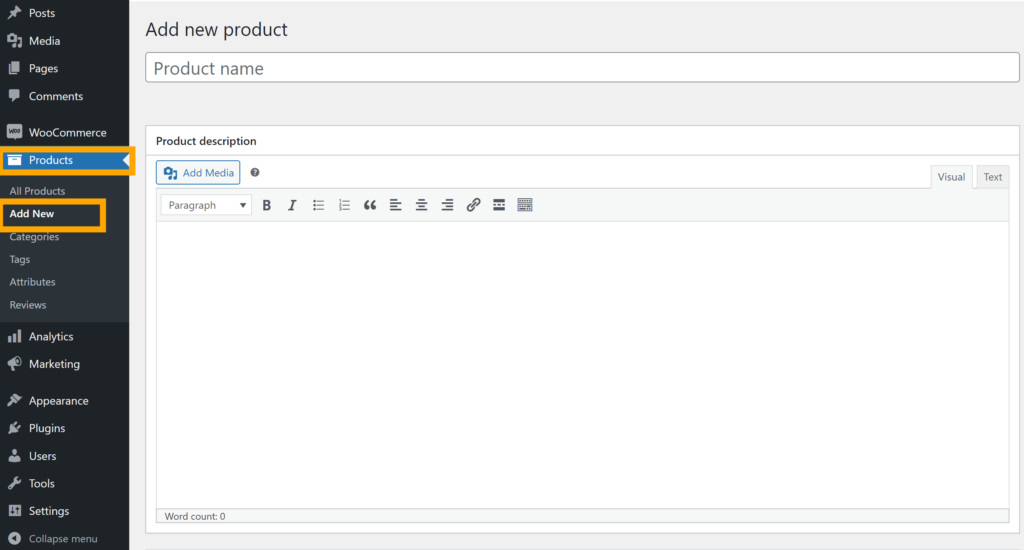
It is very easy to add products n WooCommerce, simple navigate to “Products” and click on “Add New”. Then enter the name of your product and also enter description of the product.
Now, the most of the work, related to products, is done through “Product Data”, so let’s move forward.
1. General
Here you can set regular price of your product and if you want to give any discount then set sale price. You can also choose whether there would be any tax on the product or not and can also set tax class under which it falls (standard, reduced, or zero rate).
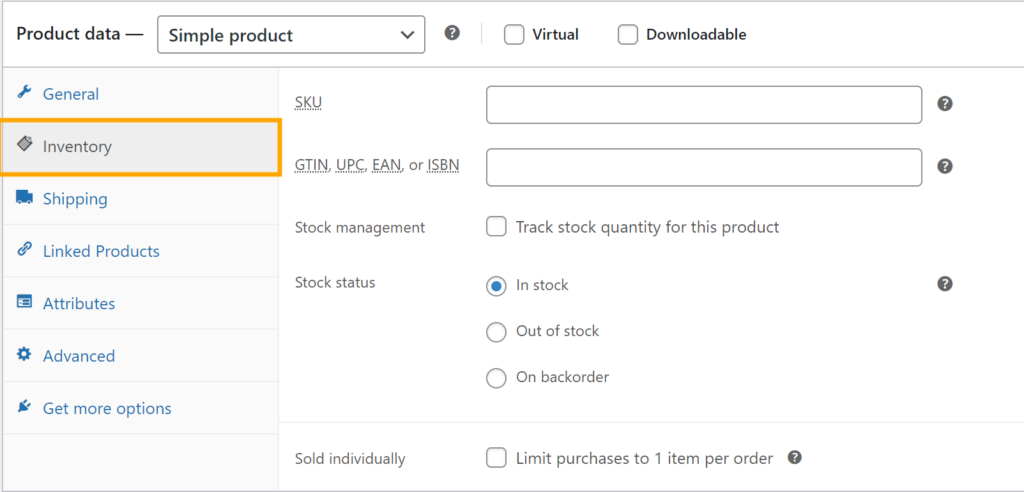
2. Inventory
In order to identify the product you can assign a unique Stock Keeping Unit (SKU) to each product. To track the availability of units enable Stock Management and stock will be automatically reduced after customers purchase. Set the Stock Status of the product whether it is in stock or out of stock. and can set many more things.
3. Shipping
For each product enter their weight and dimensions (length, width, height) for shipping calculations.
If a product needs shopping rules then assign a shipping class.

4. Linked Products
The Linked Products section allows to add similar and related market products to the user section allows you to add related and similar market products to the user. By using upsells and cross-sells your products are promoted.

5. Attributes
In the Product Attributes section, custom attributes like color, size, or material, can be added which will help in describing the product. If you are using variable products Then they are significant.

6. Advanced
In the Advanced section you are allowed to create customer purchase notes and can also enable or disable notifications. In the menu, the order can be specified and for your product you can also choose custom order positions.

When you completely filled details, then simple Publish your product:

As you saw Product Data panel provides a very flexible and powerful way for managing products of your online store. It has several options such as inventory management, pricing, attributes, shipping, and more. you can sell all types of products from Simple to variable.

With 23+ years in the Web Hosting Industry, Brian has had the opportunity to design websites for some of the largest companies in the industry. Brian currently holds the position as Creative Director at HostPegasus Web Hosting.