Moving your website from one hosting provider to another can feel like a risky operation, especially if your site is already live and generating traffic or revenue. The fear of downtime, broken pages, or lost data stops many people from upgrading to better hosting. But the truth is, with the right process, you can migrate your website smoothly and keep it online the entire time.
This guide walks you through how to transfer your website from one host to another safely, explains different migration methods, and shows you how to avoid downtime completely. Whether you’re running a personal blog or a business website powered by WordPress, the principles remain the same.
Why You Might Need to Transfer Your Website
There are many valid reasons to move your website to a new hosting provider. Over time, your needs change, and your current host may no longer be the best fit.
One of the most common reasons is performance. A slow website can hurt user experience and reduce your rankings in search engines. If your current host cannot deliver fast load times, it may be time to move.
Another reason is reliability. Frequent downtime or server errors can damage your reputation and cost you visitors. A more stable host can improve uptime and consistency.
Cost is also a factor. Some hosting providers increase prices after the initial signup period. Others may not offer the features you need for the price you are paying.
Security concerns, lack of customer support, and limited scalability are additional reasons people choose to migrate their websites.
Regardless of the reason, transferring your website is often a smart long-term decision if done correctly.
Understanding Downtime and Why It Happens
Downtime occurs when your website becomes unavailable to visitors. During a migration, downtime usually happens because of DNS changes or incomplete file transfers.
DNS, or Domain Name System, is what connects your domain name to your hosting server. When you switch hosts, you need to update your DNS records to point to the new server. This process can take time to propagate across the internet.
If the new server is not fully ready when DNS changes are made, visitors may see errors or incomplete versions of your site.
The key to avoiding downtime is preparation. You need to ensure your new hosting environment is fully configured and tested before making any DNS changes.
Preparing for a Smooth Website Migration
Preparation is the most important step in a successful migration. Skipping this stage increases the risk of errors and downtime.
Start by creating a full backup of your website. This includes all files, databases, and configurations. Even if everything goes smoothly, having a backup gives you peace of mind.
Next, set up your new hosting account. Most providers offer easy setup tools, especially for platforms like WordPress. Install your website software on the new server so you have a foundation to work with.
Make sure your new hosting environment meets all requirements. Check PHP versions, database compatibility, and server settings. Matching your current setup helps avoid unexpected issues.
It is also a good idea to lower your DNS TTL (Time to Live) value before migration. This helps DNS changes propagate faster later on.
Method 1: Manual Website Migration
Manual migration gives you full control over the process and is suitable for those who are comfortable working with files and databases.
The process begins by downloading your website files from your current host. This is usually done through FTP or a file manager. You will also need to export your database using a tool like phpMyAdmin.
Once you have your files and database, upload them to your new hosting server. Then, import the database into your new environment.
After that, update your configuration files to connect your website to the new database. For WordPress sites, this involves editing the wp-config.php file.
Manual migration allows for precise control, but it requires attention to detail. A small mistake can cause errors, so testing is essential.
Method 2: Using Migration Plugins
For users who prefer a simpler approach, migration plugins are an excellent option. These tools automate much of the process and reduce the risk of human error.
Many WordPress migration plugins allow you to export your entire website into a single file and then import it into your new host. This includes files, databases, themes, and plugins.
The advantage of this method is convenience. You do not need deep technical knowledge, and the process is often completed in just a few steps.
However, large websites may encounter size limitations depending on your hosting plan. In such cases, you may need to adjust settings or use premium versions of the plugin.
Method 3: Hosting Provider Migration Services
Many hosting providers offer free or paid migration services. This is often the easiest option because experienced technicians handle the entire process for you.
You simply provide access to your current hosting account, and the new provider transfers your website to their servers. They also test the site to ensure everything works correctly before switching it live.
This method is ideal for beginners or anyone who wants to avoid technical work. It is also one of the safest ways to prevent downtime because professionals manage the transition.
How to Test Your Website Before Going Live
Testing is a critical step that many people overlook. Before pointing your domain to the new host, you should verify that everything works correctly.
Most hosting providers allow you to preview your site using a temporary URL or by modifying your local hosts file. This lets you see how your site will look on the new server without affecting live visitors.
Check all pages, links, images, and forms. Make sure your website loads correctly and that there are no missing elements.
If you are using WordPress, log into the dashboard and confirm that plugins, themes, and settings are functioning as expected.
Testing ensures that when you go live, there are no surprises.
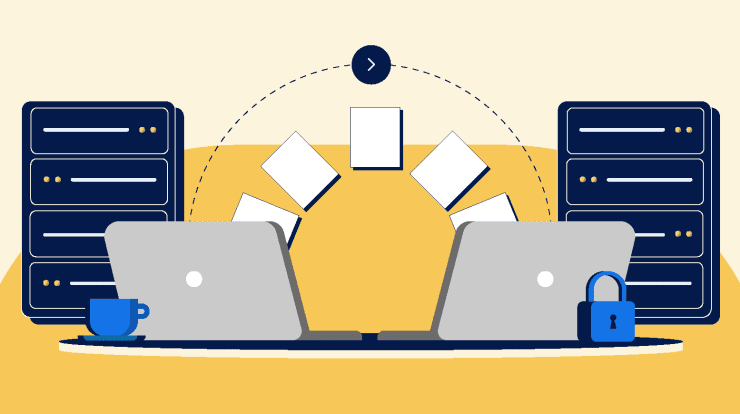
Switching DNS Without Downtime
The moment of truth in any migration is updating your DNS settings. This is where downtime can occur if not handled properly.
To avoid downtime, both your old and new hosting environments should remain active during the transition. Do not cancel your old hosting account yet.
Once your new site is fully tested, update your domain’s DNS records to point to the new server. Because DNS propagation takes time, some visitors may still reach the old server while others reach the new one.
Since both servers are running the same website, visitors will not notice any difference. This is how downtime is avoided.
After propagation is complete, all traffic will go to the new server.
Handling Email During Migration
One often overlooked aspect of migration is email. If your hosting provider manages your email accounts, moving your website may affect email delivery.
Before migrating, check where your email is hosted. If it is tied to your web host, you will need to recreate email accounts on the new server.
Make sure to back up important emails if necessary and update your MX records if required. This ensures that email continues to function without interruption.
Common Mistakes to Avoid
Website migration can go smoothly, but there are common mistakes that can cause problems.
One major mistake is not creating a backup. Without a backup, any issue during migration could result in permanent data loss.
Another mistake is changing DNS before the new site is ready. This can lead to visitors seeing incomplete or broken pages.
Failing to test the new site thoroughly is another common issue. Even small errors can affect user experience and functionality.
Canceling your old hosting account too early is also risky. Always wait until you are certain the migration is complete and stable.
Post-Migration Checklist
After your website is live on the new host, there are a few final checks to complete.
Make sure all pages load correctly and that there are no broken links. Test forms, login areas, and any interactive features.
Check your website speed to ensure performance has improved. Monitor your site for any unusual behavior over the next few days.
If you use analytics or SEO tools, confirm that tracking is still working correctly.
Finally, once you are confident everything is stable, you can safely cancel your old hosting account.
Benefits of a Successful Migration
When done correctly, migrating your website can provide significant benefits.
You may experience faster loading times, improved uptime, better security, and enhanced support. These improvements can lead to higher search engine rankings and better user engagement.
A successful migration also gives you more flexibility to scale your website as it grows.
Final Thoughts
Transferring your website from one host to another does not have to be stressful or risky. With proper planning, testing, and execution, you can complete the process without any downtime.
Whether you choose manual migration, a plugin-based approach, or a hosting provider’s migration service, the key is preparation. Ensure your new environment is fully ready before making any changes, and keep both servers active during the transition.
Platforms like WordPress make website management more accessible than ever, and with the right approach, even complex tasks like migration can be handled smoothly.
In the end, a well-executed migration is an investment in your website’s future, providing better performance, security, and reliability for years to come.

With 23+ years in the Web Hosting Industry, Brian has had the opportunity to design websites for some of the largest companies in the industry. Brian currently holds the position as Co-Founder and Creative Director at WebHosting,coop Internet Cooperative